Managing Accounts. While Windows 8 supports numerous account types as explained in the previous section about the People app
While Windows 8 supports numerous account types as explained in the previous section about the People app, only a few of them–Hotmail, Google, and Exchange (which handles Exchange Server, Office 365, many other Exchange ActiveSync‑based account types), and IMAP–provide e‑mail support that works with the Mail app. Put another way, the Mail app functions much like a mobile device mail application and not like a full‑featured desktop application such as Outlook. It’s basically just an EAS e‑mail app–Hotmail and Google use EAS behind the scenes to sync with mobile devices–though to be fair, it’s more accurately described as a connected mail app, since it does also work with IMAP‑based e‑mail accounts too.
This design has its pros and cons, but the end result is that Mail, like Windows 8, is forward leaning, and not all that concerned with legacy e‑mail solutions based on out‑of‑date technologies like POP3. If you need that kind of support, you will have to look elsewhere.
The first time you use Mail, you’ll see a little box in the bottom of the Accounts pane that explains how you add accounts and provides a link for doing so. But you can add accounts at any time by visiting the Settings pane, as with other Metro apps. To display that pane, press Winkey + I, or find it via the Charms bar, and then click Accounts. You will see a display much like that in Figure 8‑18, listing the accounts you’ve already configured.
Figure 8‑18: Mail accounts settings
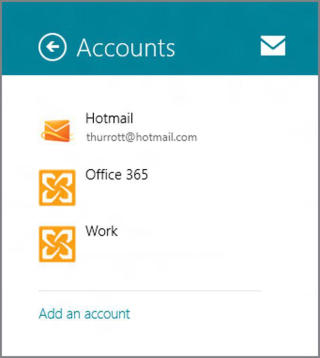
To add a new account, click Add an account. Then, in the next screen, choose among the available account types; Hotmail, Google, Exchange, or Other Account. Account creation occurs as it does in the People app, via a full‑screen Metro‑style notification like the one in Figure 8‑19.
Figure 8‑19: Adding a new e‑mail account
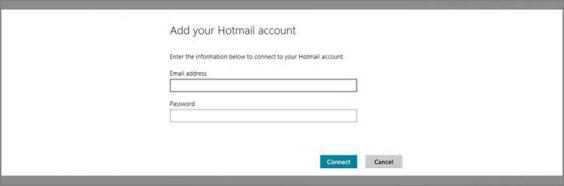
Note that if you need to configure an IMAP‑type e‑mail account, you will want to use Other Account as the account type and then click the Show more details link to enter the appropriate server information.
To manage an existing account, navigate to Settings, Accounts and then click the account you wish to edit. You’ll see a pane like that in Figure 8‑20.
Figure 8‑20: Managing an existing account
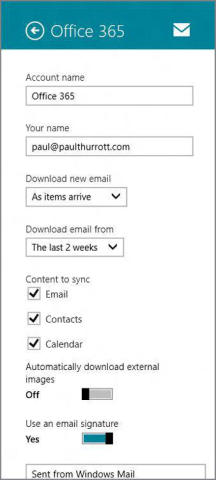
Some of the key items you can configure here include:
• Account name: The name of the account as it appears in Mail. (Mail chooses generic names like Hotmail and Exchange by default.)
• Download new email: The schedule for e‑mail retrieval, which for EAS‑type accounts can be configured to As items arrive, Every 15 minutes, Every 30 minutes, Hourly, or Manual.
• Download email from: The range of pasted e‑mail to download to your PC.
• Automatically download external images: Can be on or off depending on the security settings of your e‑mail provider.
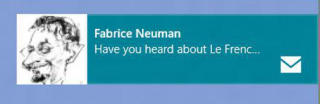
• Show email notifications for this account: Can also be set to on or off. If on, you will be notified with a “toast”‑style notification each time you receive a new e‑mail. These notifications resemble Figure 8‑21.
• Remove account: This button lets you remove the account from Mail.
Figure 8‑21: An e‑mail notification toast
Дата добавления: 2015-05-13; просмотров: 1193;