Configuring Accounts and Preferences
To do this, move the mouse cursor to the upper‑ or lower‑right corner of the screen and then move the cursor along the right edge of the screen toward the center. It’s a bit more natural to perform than it is to describe.
Like other Metro‑style apps, Windows Store provides a simple Settings interface, and it is through this interface that you can access your account settings and other store‑related preferences. Likewise, accessing this interface occurs as it does in other Metro experiences, through the Settings pane. You can access this pane from within Windows Store by typing Winkey + I, by swiping in from the right edge of the screen, or by using the mouse to enable the Charms bar and then choosing Settings.
The Windows Store settings pane is shown in Figure 6‑32.
Figure 6‑32: Windows Store settings
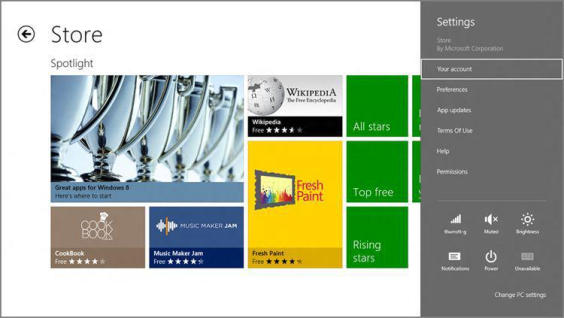
Click App updates to manually check for app updates.
While the Preferences option may seem to be the most relevant, it leads to a screen with only two configurable choices–Make it easier to find apps in my preferred languages (which is enabled by default) and Make it easier to find apps that include accessibility features (which is not). Instead, click Your account. When you do, you’ll see a full‑screen interface like that in Figure 6‑33.
Figure 6‑33: Your account
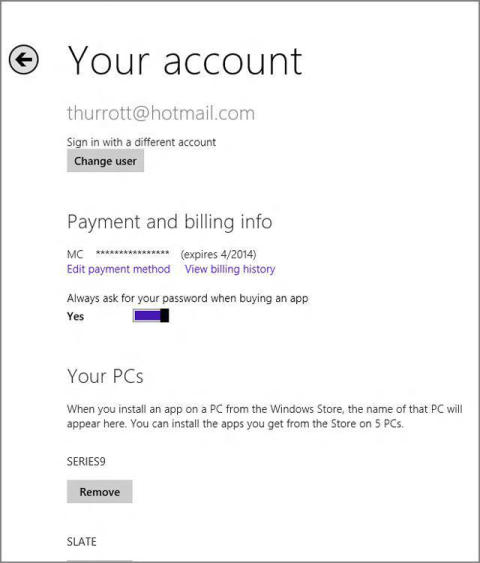
From here, you can configure some useful settings related to Windows Store. These include the following:
• Your store account: You can sign out of your current account and use a different account for store activities.
• Payment and billing information: Windows Store uses the credit card information that is registered with your Microsoft account for purchases by default, so this option is generally set to No. However, if you’d prefer to manually sign in to your Microsoft account every time a purchase is made for security reasons, you can make that change here.
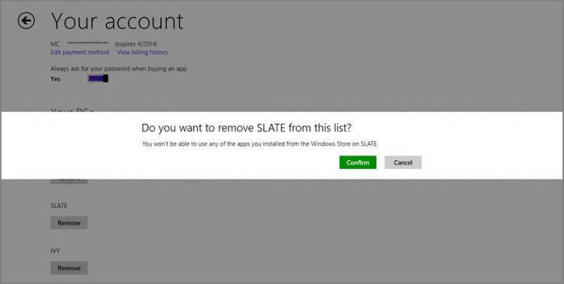
• Your registered PCs (and devices): When you install any app (paid, free, trial) on a PC or device, it is added to the list of 5 PCs/devices to which you can install apps. These apps, of course, and the 5 PCs/devices list, are tied to your Microsoft account. Via this interface, you can remove a PC/device from the list of your registered PCs and devices, as shown in Figure 6‑34. Doing so will prevent those apps from running on the deselected PC/device going forward.
Figure 6‑34: Removing a PC from your list of registered PCs and devices
Дата добавления: 2015-05-13; просмотров: 1419;