Common Sense Security Tips for Picture Password
With the understanding that common sense is a key aspect of anyone’s personal security regimen–and, on the flip side, that human error is almost certainly the number one factor behind most security mishaps–we feel compelled to remind readers that picture password, like any other authentication scheme, is only as secure as you make it. So use some common sense when creating a picture password, keeping the following tips in mind:
• Complexity: It’s not hard to guess that a picture password that uses a person’s headshot as the picture most likely involves poking both eyes and making a smile across the lips. Be more creative than that and use a photo that is more complex, with less obvious points of interest.
• Use different gestures: Three identical straight lines do not secure apicture password make. Consider mixing it up, using a combination of taps, straight/curved lines (in both directions), and circles that move in both directions (clockwise and counter‑clockwise).
• Physically shield the screen: You wouldn’t let strangers watch you enter your bank card’s PIN at a cash machine. Don’t let onlookers see your picture password … no matter how cute you think it is.
• Clean the screen: Today’s touch‑screen devices leave indelible smudges each time you tap or gesture. So be sure to keep your screen clean, reducing the chance that someone could tilt the device in the light and quickly guess which gestures you use to sign in.
You’re not locked into using this or any other sign‑in type. You could have a password, a picture password, and a PIN all configured for the same account and then choose which to use at sign‑in time.
• Create (or change) a PIN: If you’ve ever used a smartphone, you know that four‑digit PINs, or personal identification numbers, are the norms for securely signing in on such devices. This sign‑in option allows you to use the same convenient sign‑in type on your Windows PC or device, and while it’s particularly nice for touch‑screen devices, we’ve both switched to using this sign‑in type on our traditional desktop PCs, too, since it’s so fast. Setting up a PIN is very straightforward, and each digit must be a number.
NOTE
Oddly enough, you can use the picture password and PIN sign‑in types even with a domain account. However, some corporations have very strict password policies, so as is the case with other options in this chapter, you may not be able to use these features with a work‑based domain account.
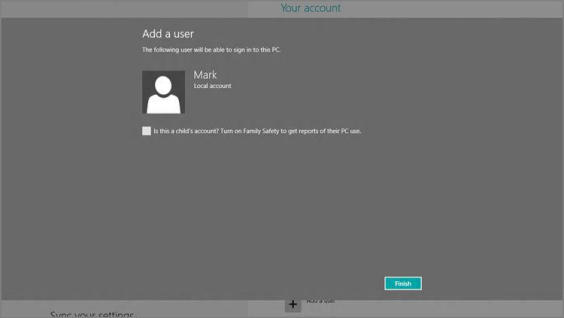
• Add a user: If you select the Add a user link under Other users, you’ll be presented with the new full‑screen interface shown in Figure 12‑6. It’s set up for a Microsoft account by default, but you can click the link titled Sign in without a Microsoft account to configure a traditional local user account instead.
Figure 12‑6: Add a user, Metro‑styled
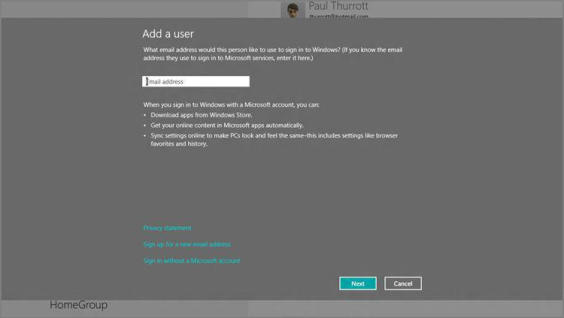
So, yes, you can mix and match Microsoft and local accounts (and even domain accounts) on a single PC, though our general rule about using Microsoft accounts exclusively when possible still applies for your own PCs.
Advanced User Management with Control Panel
PC Settings is cute and everything, but if you want to dive into the nitty‑gritty of user account management, you’ll need to visit the old‑school Control Panel interface instead. And yes, you still want to know about this interface even if you’re not particularly interested in advanced features. And that’s because there are certain things related to account management that you can only do from Control Panel.
For example, the very first account you create with Windows 8 is always an administrator‑class account, and that’s true whether that account is a Microsoft account, as recommended, or a traditional local account. But when you create other accounts, as explained earlier, those accounts are not administrator‑type accounts. And the Metro‑style PC Settings interface doesn’t offer any way to change them.
But Control Panel does. In fact, Control Panel provides so much additional functionality with regards to user accounts that it seems a shame to ignore it.
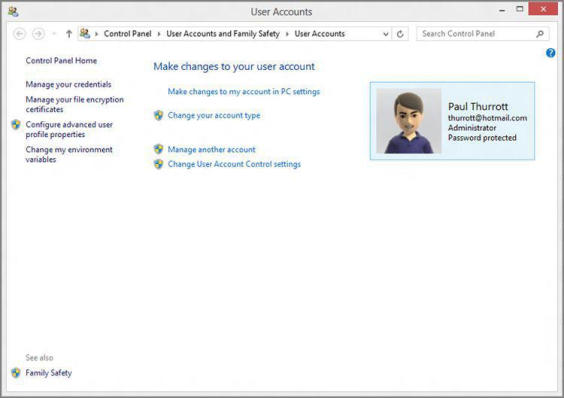
Of course, you need to find it first. The easiest way is via Start Search: Display the Start screen, type user , select the Settings filter in the right pane, and then choose User Accounts in the results list. This displays the old‑school User Accounts control panel, as shown in Figure 12‑7.
Figure 12‑7: User Accounts control panel
Here are some of the user account–related tasks you can only complete using Control Panel:
If you have only configured one user account, you cannot, however, change it from an administrator‑type account to a standard user account. You must always have one administrator configured on the PC.
• Change an account type: As noted previously, the first account you configure on your PC–whether it’s a Microsoft account or a local user account–is an administrator‑type account. But what about subsequent accounts? As it turns out, all subsequent account additions–be they Microsoft or local accounts–are created as standard users, not administrators. This may be desirable, but if you’d like to change an account from one type to the other, you can do so.
To change an account’s type, click the link Manage another account in the User Accounts control panel. This will change the display to resemble Figure 12‑8, where you can choose an account to change.
Figure 12‑8: The Manage Accounts interface lets you configure user accounts.
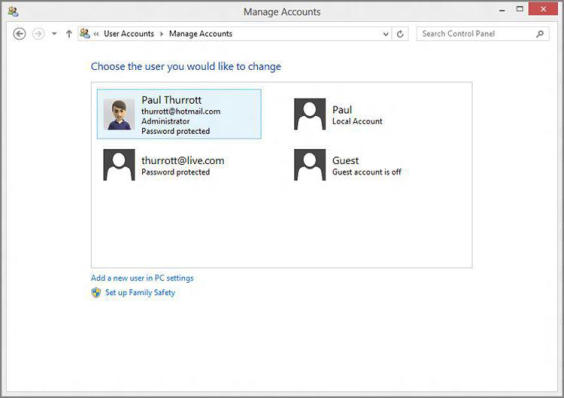
When working with a local account, you can also use this screen to change the account name, create or change the password, set up parental controls, or delete the account.
Select the account you wish to modify to display a screen like that in Figure 12‑9. Here, you can see a secondary Microsoft account that was automatically configured as a standard account type when it was added to the system.
Figure 12‑9: If it doesn’t say Administrator above “Password protected,” it’s not an administrator.
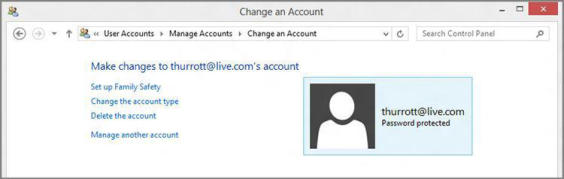
When working with a Microsoft account, you can also use this screen to set up parental controls or delete the account (from the PC).
Click the Change the account type link, choose Administrator, and then click the Change Account Type button. Now, you can see as in Figure 12‑10, that this other Microsoft account is an administrator too.
Figure 12‑10: The secondary Microsoft account has been transformed from peasant to lord.

• Manage User Account Control: In Windows Vista, Microsoft introduced what was then a very controversial feature called User Account Control, or UAC, which took advantage of Microsoft’s efforts to componentize Windows by dividing each of the system’s functional entities, or components, into one of two groups: those that require administrative privileges and those that don’t. Those that don’t would just work and you could just go about your day and not really think about the security implications of anything underpinning the system.
But then there are those other components that do require an administrator‑class account to actually work. Those components are a bit trickier. These components will trigger a UAC dialog, or prompt, that must be bypassed before you can continue whatever task you are trying to complete.
UAC is theoretically annoying, but it’s been refined over the past two Windows versions to be, well, less noisy. That is, it doesn’t rear its head very often anymore, and if you’re logged in with administrator privileges–and chances are, you are–it will rarely do more than interject a small “Are you sure?” type dialog to interrupt your workflow.
This interruption will vary according to what you’re trying to do–a UAC prompt appears when you try to install an application, for example–and according to what type of user account you’re using. But the important thing to note is that the presentation of UAC prompts hasn’t really changed since Windows 7. So unless you’ve been using Windows XP for the past few years, you already get the drill. It works much as it did in Windows 7 and is much less annoying than it was in Windows Vista.
Configuring User Account Control works as it did in Windows 7, via the User Account Control Settings control panel. So there’s no need to waste time on it: UAC works as before, isn’t annoying, and shouldn’t be messed with.
NOTE
Okay, there is one interesting side note about UAC in Windows 8: One place you’ll never see this prompt is in any of Windows 8’s Metro experiences. That’s because UAC is a desktop technology, and the Metro environment has its own more pervasive protections built in and designed to protect the OS from exactly the kinds of issues that UAC, too, is aimed at.
• Enable and configure Family Safety: Microsoft first provided pervasive Windows‑based parental controls functionality in Windows Vista, providing parents with a way to create and enforce settings related to computer usage, including a web filter (for allowing and disallowing individual websites and downloading), time limits, games, and applications (including which can and cannot be used).
Parental controls are not available when you sign in as a domain user.
In Windows 8, Microsoft is carrying forward the parental control functionality from its predecessor, and it works almost exactly the same way, with a few useful improvements. Parental controls, called Family Safety in Windows 8, can be applied only to non‑administrator accounts–including Microsoft accounts, which is indeed new to Windows 8–and is administered one account at a time.
There are two ways to add parental controls to an account. You may recall that when you add a new account to the system, it’s silently created as a standard user account, and not as an administrator. So as an added nicety, Windows 8 provides a check box option, shown in Figure 12‑11, which lets you enable Family Safety right when the account is created.
Figure 12‑11: You can enable parental controls when you add a new account to the PC.
Or, you can add parental controls to an account after it has been created. To do so, select Manage another account from the main User Accounts control panel, select the account you want to manage, and then select Set up Family Safety. The Family Safety interface resembles Figure 12‑12.
Figure 12‑12: Family Safety helps you protect your children online and on the PC.
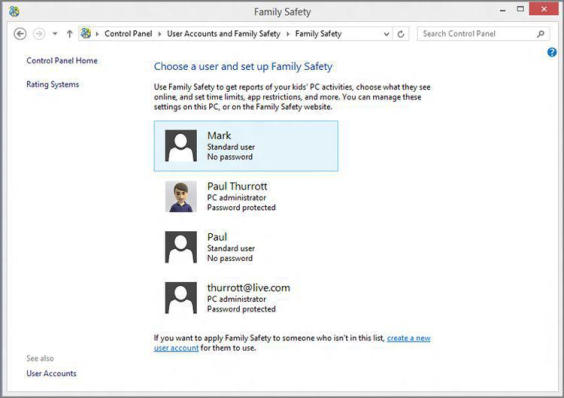
If you’re familiar with the parental controls functionality that was included in Windows 7, all of the functionality from that release carries over into Windows 8. But there are a few useful additions in this release, too. For example, where the Windows 7 parental controls allowed you to specify the hours of each day that the child could use the PC–this feature is now called “curfew”–Windows 8 adds the ability to limit how many hours they can use the PC each day as well. Additionally, Family Safety integrates with Windows Store so you can see and control which Metro‑style apps and games your child downloads, based on country‑specific ratings; in the United States, we use ESRB (Entertainment Software Ratings Board) ratings.
• Enable the Guest account: While you can go to great lengths to protect standard user accounts with parental controls, sometimes all you’re looking for is a single, temporary user account with standard user privileges that anyone can use. As with previous Windows versions, Windows 8 includes such an account, called the Guest account, and it’s a safe and easy way to let others use your PC without worrying that they’re going to view, modify, or delete any crucial data, uninstall or change an application, or perform other dangerous tasks.
To enable the Guest account, select Manage another account from the main User Accounts control panel. Then, in the Manage Accounts screen, choose Guest. (Its icon will note that the Guest account is off.)
The control panel will ask you whether you’re sure you wish to enable this account, noting that password‑protected files, folders, and settings are not accessible to guest users. Click Turn on to enable the Guest account.
Now, when you leave the computer, you can lock your account (easiest way: Winkey + L). And then your children or actual guests can browse the web, run apps, and perform other common duties using the Guest account while you’re away: A new Guest option will appear on the lock screen.
Remember that the Guest account is temporary to each sign‑in. So when the user signs out of the Guest account, any settings changes or documents they’ve created will be deleted. Each time you sign in to the Guest account is like the first time that account is used, and nothing is retained.
• Reset EAS Policies: When you sign in to a Windows 8 PC or device with a Microsoft account, you’re using a technology called Exchange ActiveSync (EAS) under the covers to provide push‑based access to your Hotmail‑based e‑mail, calendar, contacts, and other data. EAS is a Microsoft‑created corporate standard that is used by Hotmail and Microsoft’s Exchange‑ and Office 365‑based services, and also by competing services from Apple, Google, and other companies. (In this way, it’s a de facto standard for all modern mobile devices.) And one of its big advantages is that it supports the notion of EAS policies, which can set restrictions on the device–smartphone, tablet, or PC–that you use to access the underlying services. For example, your workplace may want to ensure that you sign in with an account that has an acceptable password (from a length and complexity standpoint) and then auto‑locks after a certain period of inactivity.
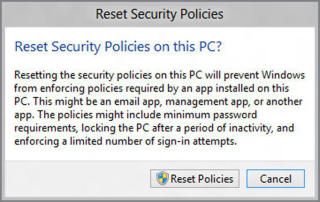
When you sign in with a Microsoft account, whatever restrictions Hotmail enforces are automatically applied to your PC. But this is only required if you are using Microsoft’s bundled Mail app. If you access Hotmail’s e‑mail, calendar, and contacts from a Windows application, or from the web, you can decouple Hotmail’s EAS policy requirements from your PC. And, oddly enough, you do this from the User Accounts control panel: Just click Reset EAS Policies on the left, and you’ll see a window like the one shown in Figure 12‑13.
Figure 12‑13: You can reset EAS policies on your PC.
Дата добавления: 2015-05-13; просмотров: 1324;