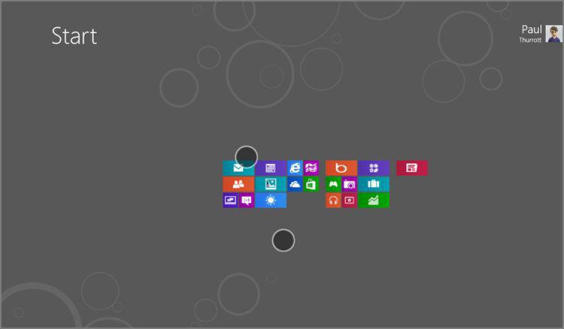
Customizing the Start Screen
The Start screen is unique for many reasons. As the new default user interface for Windows 8 and the place by which you will launch and, via their live tile updates, monitor your running apps, it’s the central dashboard that many users will face, literally, each day. Not surprisingly, it offers a number of useful customizations. Oddly, however, these customizations can occur through two interfaces. That is, some of the customizations occur through PC Settings, as with other Metro features. But some occur directly from within the Start screen itself.
Changing the Start Screen Theme
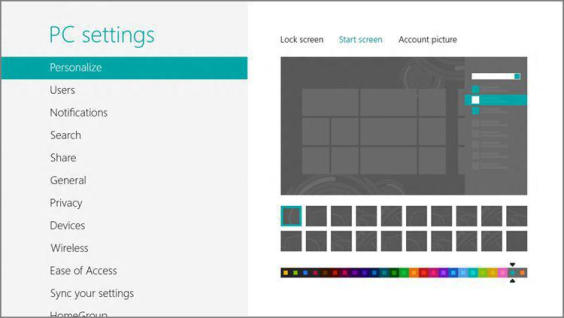
If you navigate to PC Settings, Personalize, Start screen, you’ll see the interface shown in Figure 5‑8. From here, you can choose the theme that is applied to the Start screen, a combination of background pattern, accent color, and background color.
If you’re not a fan of the background patterns, you can thankfully choose no pattern, which is the final square in the grid of pattern squares. What you can’t do is choose an arbitrary combination of accent and background colors. Instead, Microsoft has chosen combinations that it thinks work well together. For example, if you like a dark purple background color, your only accent color options are two shades of light purple. You’ll find that the gray backgrounds tend to have the most accent color choices for whatever reason.
Figure 5‑8: Start screen theme selection
Determining Which Tiles Appear on the Start Screen
Windows 8 ships with a default selection of live tiles, and of course PC makers can add their own. And as you install Metro‑style apps and traditional Windows applications, more tiles will be added to the Start screen so that, over time, it becomes a mess of useful and non‑useful tiles alike. Fortunately, you can configure which tiles appear on the Start screen.
• Remove a tile: To remove a tile, you must first select it. This is most easily done with a mouse, where a simple right‑click is all that’s required. But it can be done via touch, of course, and far less easily via the keyboard, too. With touch, you must perform a short downward swipe on the tile to select it. With the keyboard, use the arrow keys to navigate to the tile in question–you’ll see a selection rectangle as you go–and then press the spacebar on the appropriate tile.
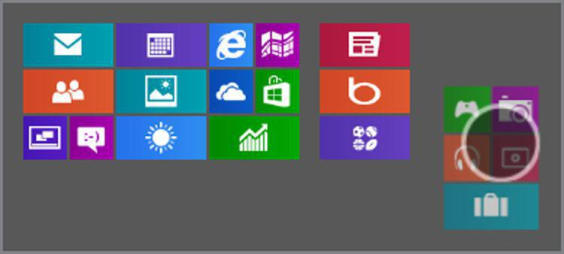
However you do it, when you select a tile on the Start screen, you will see that an app bar like the one in Figure 5‑9 appears. This bar includes an Unpin from Start button: Just select that option to remove the tile.
Figure 5‑9: Selecting a tile on the Start screen
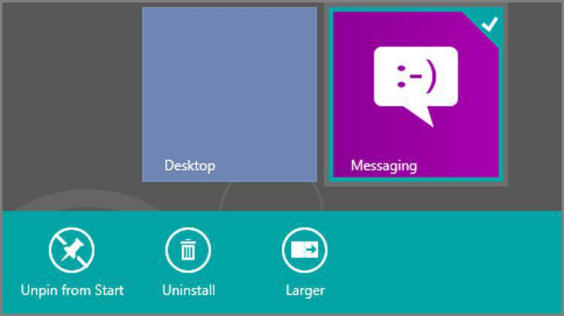
You can also select multiple tiles at once. To do so, simply select one tile and then perform the same selection action–based on whichever input type you prefer–on other tiles in sequence. You can arbitrarily select as many tiles as you’d like and then unpin them all at once.
• Add a tile: You can also add a tile to the Start screen. There are two methods for doing so.
Various items can be pinned to the Start screen, such as Metro‑style apps; Windows desktop applications; File Explorer and various Explorer‑based locations, including folders, libraries, and the like; and websites.
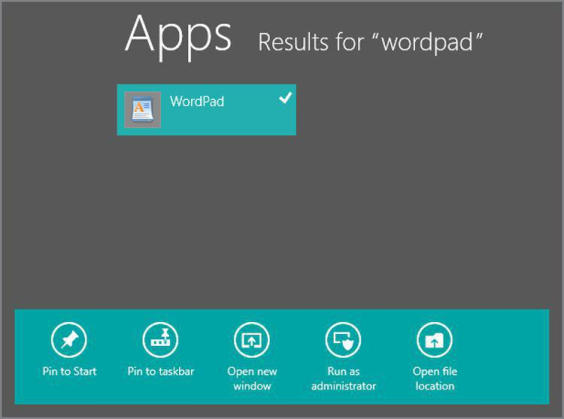
From the Start screen, you can search for the item you wish to pin. To do so, just start typing and Start Search will appear. For example, if you wish to pin WordPad to the Start screen, type wordpad in Start Search. Then, as shown in Figure 5‑10, right‑click (or otherwise select) WordPad in the search results and choose Pin to Start.
Figure 5‑10: Pinning a new application or app to the Start screen
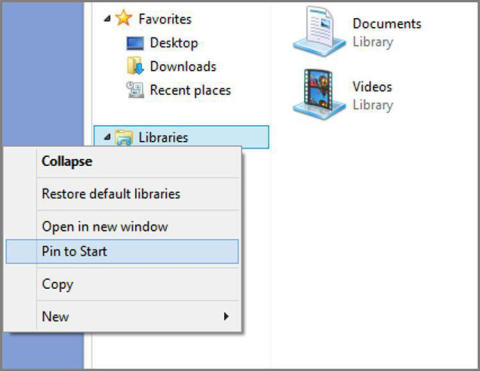
You can also pin some items from the Windows desktop environment. Some desktop icons–like Recycle Bin, Computer, Network, and similar–can be pinned: Just right‑click one on the desktop and choose Pin to Start. You can do the same for libraries, the homegroup, and various folders from within File Explorer as well. For example, in Figure 5‑11, you can see that Pin to Start is an option when you right‑click any location in the Explorer navigation bar.
Figure 5‑11: Pinning from the desktop
Arranging and Grouping Tiles on the Start Screen
Adding and removing tiles is nice, but of course most people will also want to arrange tiles on the Start screen so that they appear in the order they prefer. This is obviously possible, as is the ability to group icons into visually segregated groups.
To move a tile’s location, simply select it with the mouse or, on a touch screen device, with your finger and drag it around on the screen. As you can see in Figure 5‑12, as you do so, tiles will part and redistribute intelligently to accommodate the tile you’re moving.
Figure 5‑12: Rearranging the tiles layout on the Start screen
You can also group Start screen tiles. To create a new group, select a tile and move it to the far left or right of the current group until you see a new group bar appear as in Figure 5‑13; this is your indication that dropping the tile there will create a new group.
Figure 5‑13: Creating a new tile group
And when you do release the tile, you can see that it’s by itself in a new group (Figure 5‑14). Now you can just move other tiles into that group as you would normally.
Figure 5‑14: A lonely tile group of one
TIP
How you arrange and group tiles is of course up to you, but many people like to group them logically, with media apps (Music, Video, and so on) together in one group, productivity apps in another, and so on.
You can also move and even name groups. To do so, you need to take advantage of a cool Metro feature called semantic zoom which lets you visually zoom the entire Start screen so you can see the whole layout at once in a kind of thumbnail view.
You can enable semantic view most easily via touch or mouse. With touch, simply pinch the Start screen. As you do, the tiles will visually shrink until they’re a small group of thumbnails as in Figure 5‑15.
Figure 5‑15: Semantic zoom
With a mouse, move the mouse cursor in the lower‑right corner of the screen and click the tiny semantic zoom button, which can be seen in Figure 5‑16. This tiny button will immediately place the screen into semantic zoom view as well.
Figure 5‑16: It’s easy to miss, but this button will display the Start screen with semantic zoom.

There are two basic actions you can perform in this view.
• First, you can arrange groups. To do so, simply select a group–using the same methods that are used to select an individual tile–and then drag it around the thumbnail view of the Start screen, positioning it where you want, as in Figure 5‑17.
Figure 5‑17: Rearranging the layout of tile groups
• Second, you can optionally name each tile group. To do this, select the group you wish to name while in semantic view–again, using the same selection technique you learned for tiles–and then tap the Name group app bar button that appears. It will provide a text box for you to type the name. And when you are done, the group name will appear over the top‑left area of the group, as shown in Figure 5‑18.
Figure 5‑18: A named tile group
To exit semantic zoom, use the stretch gesture (a sort of “reverse pinch”) on a touch‑based screen. Or, with a more traditional PC, type Esc or click on any empty spot on the screen.
Customizing Individual Start Screen Tiles
Looking at your Start screen, you’ve probably noticed that the tiles are two different sizes. There are large rectangular tiles and then smaller, square tiles. This raises a few questions, but key among them is whether it’s possible to customize individual tiles so that they are one or the other size. It depends.
Tiles that represent Metro‑style apps can support both tile sizes. And most do, though it’s not a requirement. So you may occasionally run into a Metro‑style app that offers only one tile size. But in either large or small variants, these tiles can optionally be live, offering app‑related updates graphically or textually.
Tiles that represent websites, traditional Windows applications, or Explorer locations support only the smaller, square tile size. These types of tiles are not live: They provide the name of the app or experience only, and some icon. That’s it.
You can customize a live tile in the following ways:
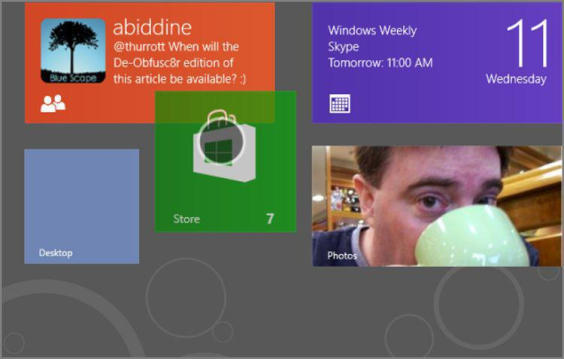
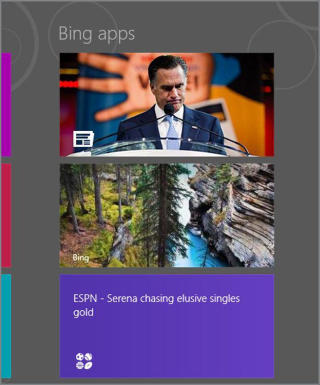
• Make it bigger/smaller: A large rectangular tile can be resized to be a smaller, square tile if you’d like. Likewise, a smaller, square tile can be resized as a larger, rectangular tile. Doing so will generally impact the amount of information displayed by a live tile, though the exact change will differ from app to app, depending on how it was created. In Figure 5‑19, you can see different versions of the same live tile, one large and one small.
Figure 5‑19: The same tile in its two supported size configurations
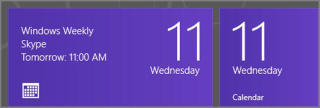
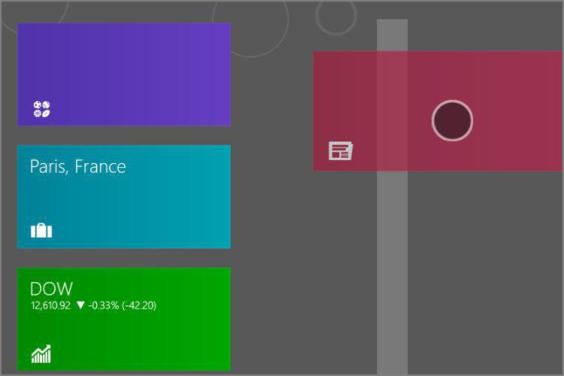
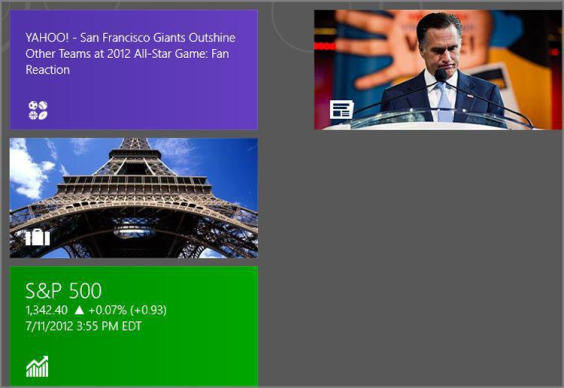
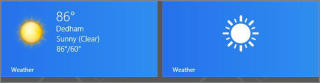
• Turn live tile on/off: While some will really appreciate the constantly updating live tiles on a typical Windows 8 Start screen, others will find it distracting or even annoying. There are two things you can try to cut down on the noise if you’re in the latter group. First, you can experiment with resizing the tiles from large to small, since those smaller tiles–while still “live”–tend to be less dynamic than their larger versions. But if you just want it to stop, you can also turn off live updating on a tile‑by‑tile basis. And this works for large as well as small tiles. In Figure 5‑20, you can see the effect this has on a typical app tile.
Figure 5‑20: Same tile with live updates on (left) and off (right)
You can’t customize the color of a tile, which is designated by the app’s creator and cannot be modified. Still, some apps let you customize the tile face in some ways. For example, the Photos app lets you apply a favorite picture as the tile face.
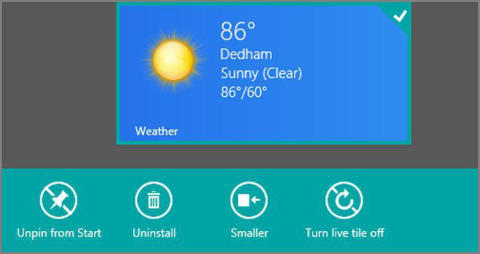
To perform either of the preceding customizations, select the tile in question and then choose the appropriate app bar button as shown in Figure 5‑21.
Figure 5‑21: Tile options in the app bar
Дата добавления: 2015-05-13; просмотров: 1239;