WARNING. We can’t stress this enough: Trust technology to do the right thing, but have a backup plan, in this case literally
We can’t stress this enough: Trust technology to do the right thing, but have a backup plan, in this case literally. That is, yes, Setup will most likely not lose any data during a migration or in‑place upgrade. But just in case, be sure to copy your important data to a removable drive and then remove that drive during Setup.
After making your selection, Setup will collect its wits and determine if there are any more steps to perform before it begins the actual process of applying Windows 8 to the PC.
You may recall that Setup could have previously informed you that one or more applications will need to be uninstalled before Windows 8 can be installed. If this is the case, you will see a prompt like the one in Figure 2‑6. Here, Microsoft Security Essentials will need to be uninstalled before Setup continues. Click the Uninstall button next to any applications that need to be uninstalled.
Figure 2‑6: Some applications will need to be uninstalled before Setup will complete.

After this process completes, Setup may need to restart the PC, depending on which types of tasks it asked you to complete. If so, Setup will resume immediately and automatically after the reboot, and it will prompt you to continue from where you left off or start over from the beginning. Choose the former and then click Next.
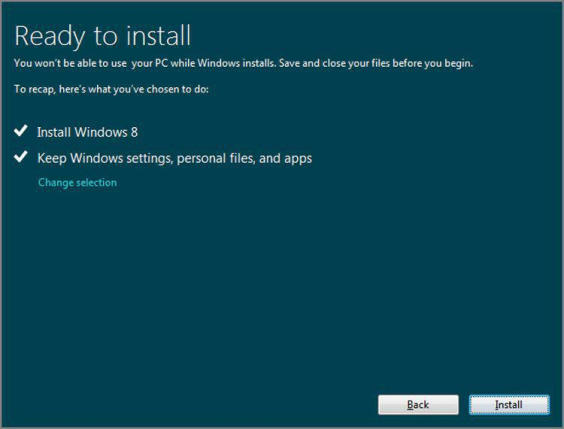
Setup will again check to make sure there are no more steps to take before it can install Windows 8. Finally, it will present the screen in Figure 2‑7 that verifies the type of install you’ve chosen. You can make a last minute change to that install type if you’re unsure.
Click Install to continue. Setup will switch into a full‑screen mode install Windows 8. During this process, which will involve a few reboots, Setup will configure hardware and install device drivers. It will also reapply your Windows settings, personal files, and other files if you configured it to do so.
Figure 2‑7: One last check and you’re ready to install Windows 8.
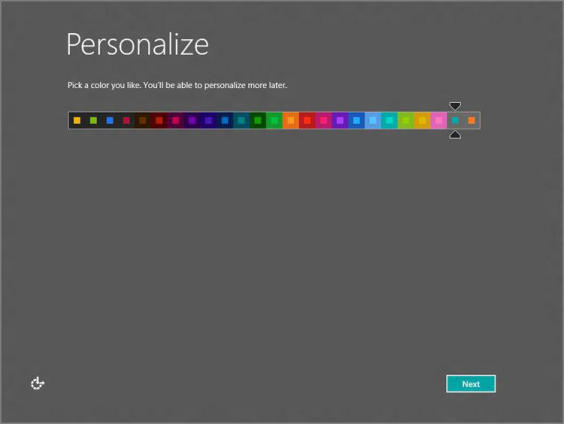
When Windows 8 is finally ready, the computer will reboot for the last time and the out‑of‑box experience, or OOBE, will appear. In the first phase of the OOBE, Personalize, you have just a single choice to make: your Metro color scheme, a set of two colors that includes an accent (or foreground) color and a background color. This scheme is used on all Metro experiences, including the Windows 8 Start screen (but not to the desktop), and all Metro apps. This screen is shown in Figure 2‑8. Pick a color scheme then click Next.
Figure 2‑8: The Personalize phase of the OOBE.
If you are using a Windows PC or device with wireless networking hardware, you will next be asked to choose a wireless network and then, if required, enter a password. Do so and then click Next.
NOTE
What you’re not asked is which type of network you’re joining. In Windows Vista and 7, this was done via a network location, where you could choose between Home, Work, or Public. This occurs a bit later in Setup and is hidden if you choose a certain option, as you’ll see.
Speaking of cute, if you don’t choose anything, Setup will assume you want a custom install and just start you down that path regardless. You can click the Back button, however, to choose Express Settings.
In the next part of OOBE, called Settings and shown in Figure 2‑9, you can choose between Express Settings and Customize, which is a cute way to potentially cut the number of OOBE steps dramatically.
Figure 2‑9: Do you want to do this the hard way or the easy way?
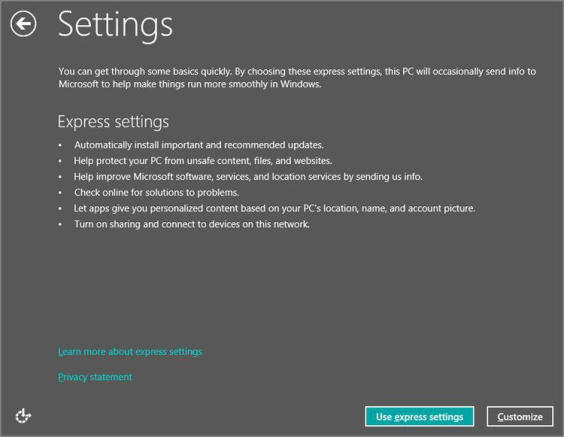
Long‑time readers know that we have always preached the need to perform the more difficult and time‑consuming configuration type in situations like this because Microsoft and other companies don’t always choose the correct defaults in their express‑type options. That said, we actually choose Express settings here. But for purposes of full disclosure, let’s examine what options you’ll configure if you choose the customized route, and what the defaults are if you choose Express.
These options include:
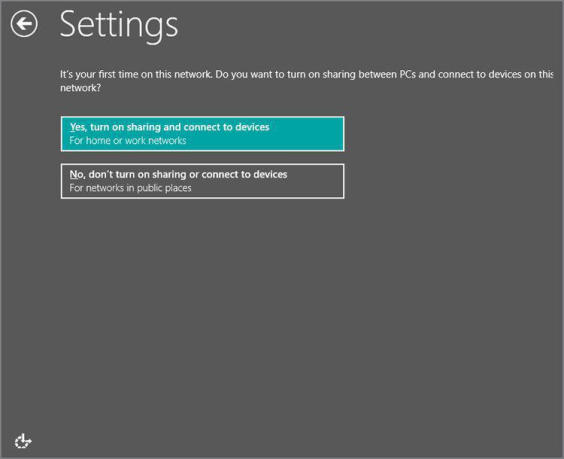
• Sharing and Connect to Devices: A simplification of the Select your computer’s current location step from Windows 7 Setup, here you can choose Yes, turn on sharing and connect to devices (for home or work networks) or No, don’t turn on sharing or connect to devices (for networks in public places). The Express default is Yes, turn on sharing and connect to devices. (See Figure 2‑10.)
Figure 2‑10: Sharing and connect to devices.
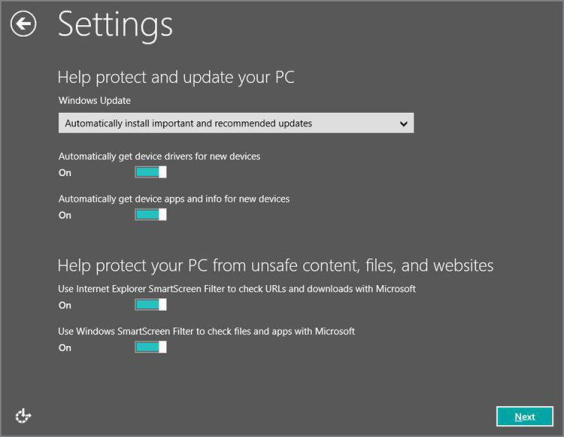
• Help protect and update your PC: Here, you configure Automatic Updates, including those for device driver updates, and the SmartScreen filter (separately for both Internet Explorer and the file system). The Express default is to enable all of these features. (See Figure 2‑11.)
Figure 2‑11: Protect and update settings
• Send Microsoft info to help make Windows and apps better: Here you choose whether to send diagnostic information to Microsoft to improve Windows, Windows Store, Microsoft’s anti‑malware online service, Location Services, the Customer Experience Improvement Program, and Windows Help, as shown in Figure 2‑12. The Express default is to enable all of these features except for Location Services.
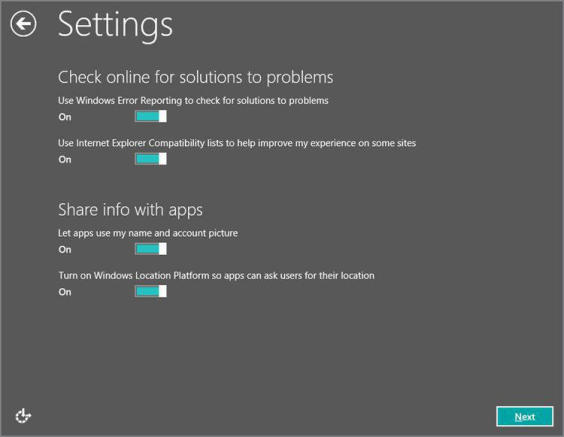
• Check online for solutions to problems: In this step, you can configure Windows Error Reporting, Internet Explorer 10 Compatibility lists, user name and account picture sharing with (Metro‑style) apps, and the Windows Location Platform, as shown in Figure 2‑13. The Express default is to enable all of these features.
Password: If you upgraded from a previous Windows version, you may be asked to supply the password for the user account you previously used to sign in. Do so and click Next.
NOTE
Don’t see an option to sign in to your Microsoft account? You won’t see this if your PC is offline. Granted, this isn’t a huge issue for a web‑based install of Windows 8 since, by definition, you have to be online to get it started. But it happens. You can later convert a local account to a Microsoft account if you’d like.
Figure 2‑12: Windows and app settings
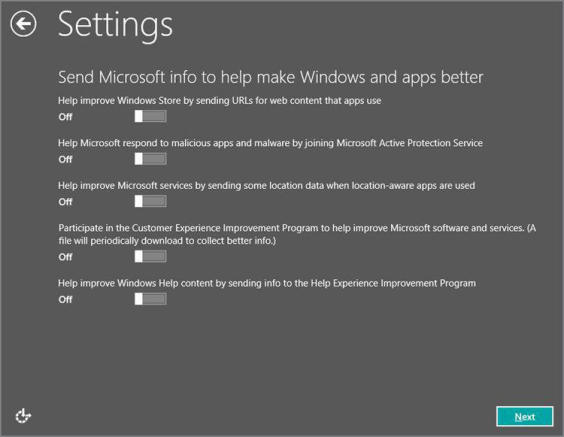
Figure 2‑13: Troubleshooting and app sharing settings
Finally, you’ll be asked to sign in to your PC, using a Microsoft account, as shown in Figure 2‑14. You’ll see this regardless of whether you performed a clean install, upgrade, or migration using the web‑based installer.
Figure 2‑14: First Windows 8 sign‑in
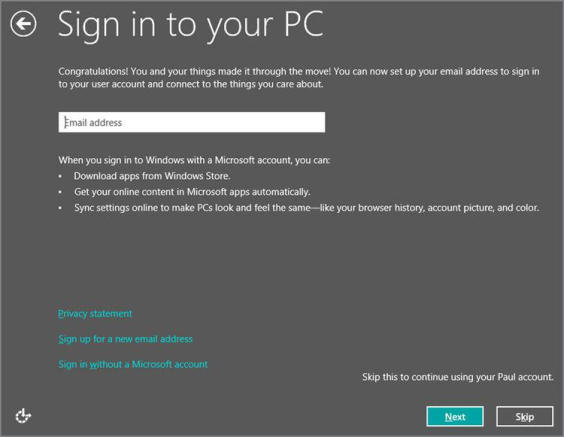
You can click Skip to use your old local account.
Windows 8 supports a new type of user account that is based around your Microsoft account, or what used to be called a Windows Live ID. And while you could still use the old‑fashioned local account that you previously configured, we recommend accepting Setup’s offer to switch this account to one based on your Microsoft account. Doing so is highly recommended: You gain impressive PC‑to‑PC settings synchronization and integration functionality by enabling this account type. As a result, we will assume you do this.
Click Next.
In the next screen, you’ll be prompted for your Microsoft account password. Enter the password for your existing Microsoft account or click Sign up for a Microsoft account to turn any e‑mail address into a Microsoft account.
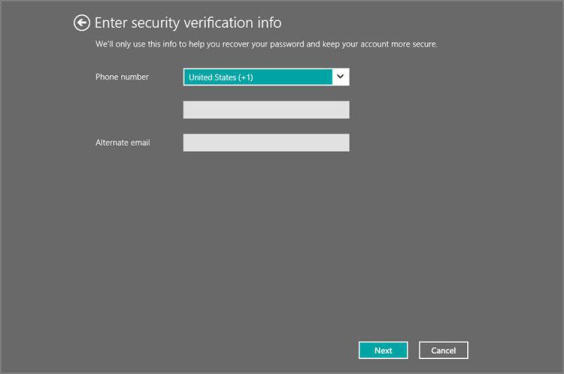
After clicking Next, you’ll be prompted to enter (or at least verify) your security verification info. To help you recover your password and keep your Microsoft account safe from hacking, this screen, shown in Figure 2‑15, lets you configure a mobile phone number and alternate e‑mail address. You’ll receive a confirmation e‑mail at your primary e‑mail, and if agreed to, you can make the current PC a trusted PC for authentication purposes.
Figure 2‑15: Security verification info
Click Next to continue.
Now, Setup creates your account on the PC and finalizes settings, and then further prepares the PC and logs on to the Start screen. When it’s done, you should be presented with a Start screen similar to the one shown in Figure 2‑16.
If you performed an in‑place upgrade or a migration, now is the time to see which customizations made it across–check by clicking the Desktop tile–and to ensure that your documents and other files are where they belong. We examine post‑Setup tasks later in the chapter, but this is a good place to begin.
Figure 2‑16: Welcome to Windows 8!

Дата добавления: 2015-05-13; просмотров: 1310;