Charms: The Uber‑Metro UI
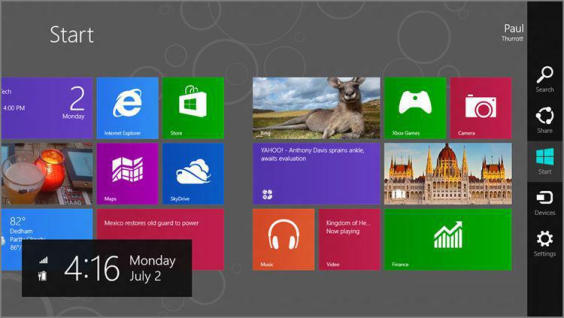
If you learn just one Metro‑based user experience, it should be how to access the Charms bar, a menu of useful system‑level options that is perhaps the key to mastering Windows 8. This is shown in Figure 3‑11.
Figure 3‑11: Charms
Before explaining Charms further, however, let’s discuss how to invoke them. Each of these access types works from anywhere in Windows 8, including the Start screen, any Metro‑style app or game, or from the Windows desktop.
• Keyboard: Type Winkey + C.
Accessing the Charms bar on a multiscreen configuration can be tricky, depending on the location and orientation of your secondary screens. Though some workarounds exist, the simplest is to use the Winkey + C keyboard shortcut instead of the mouse.
• Mouse: Move the mouse cursor into the top‑right corner of the screen. As you do, the Charms bar will appear in a translucent mode. Then, move the cursor down toward the middle of the right edge of the screen to fully engage the bar. (Conversely, you can mouse into the lower‑right corner of the screen and then move the mouse cursor up toward the middle of the right edge of the screen.)
NOTE
Why the translucency? Microsoft is accounting for other user interface elements that might be bumped up against the right edge of the screen, including a desktop application’s scroll bar or the Peek button in the taskbar. If you don’t immediately move the mouse cursor toward the middle, the Charm bar will disappear, allowing you to access whatever else is on‑screen in that area.
• Touch: To display the Charms on a multi‑touch screen, swipe in to the left from the right edge of the screen.
As you can see, there are five items, or “charms”, in the Charms bar. They are as follows:
Search: This charm provides easy access to the system‑wide search functionality in Windows 8. It’s context‑sensitive, so if you tap it from the Start screen or Windows desktop, it will trigger the new Start Search experience, which lets you find apps (and applications), settings, and files on your PC. But if you access this charm from within an app, you will instead search that app. For example, you can use this to search for e‑mail from within the Mail app.
We discuss Search in the next section of this chapter.
• Share: Via this unique charm, you can share what’s on‑screen with others using another Metro‑style app. Like many of the other charms, including Search, this functionality is tied to a new, low‑level capability in Windows 8 called contracts, in this case the Share contract. And any Metro‑style app can implement this contract to send and/or receive share requests.
Share doesn’t work at all from the Start screen (or the desktop) since these interfaces have nothing to share. To use Share, you need to be using a Metro‑style app first.
We discuss Share in more detail a bit later in the chapter.
• Start: This charm, which is color‑coded to the accent color in the Metro theme you chose, simply emulates the Windows key or Windows key button. That is, it will navigate to the Start screen from any other Metro‑based experience or the desktop. But if you’re already on the Start screen, you’ll return to the previous experience you were using.
• Devices: Like most charms, Devices is also context‑sensitive, so what you see here will be determined by two things: which compatible devices are attached to (or included in) your PC or device and what you’re doing at the time. The Device charm is most often used to access a printer or, for those with two or more screens, to determine how the secondary screens are used.
We discuss the Devices charm, and Windows 8’s support for hardware peripherals, later in the chapter.
Keyboard users can more quickly open the Settings pane by tapping Winkey + I.
• Settings: Another context‑sensitive charm, Settings provides an interesting array of features. At the top of the Settings pane that appears, shown in Figure 3‑12, you’ll see links to settings that pertain to the current view, which could be the Start screen, a Metro‑style app, or the desktop environment. But at the bottom, you will find links to settings that are always available, from any of those experiences.
Figure 3‑12: Settings pane
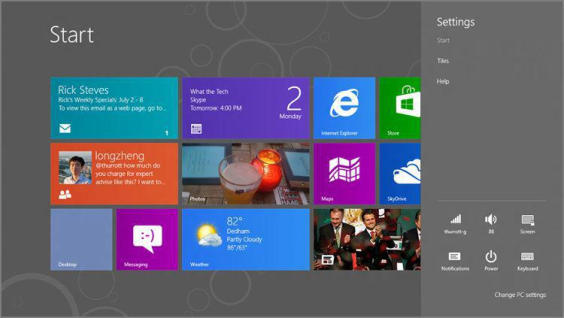
From the Start screen, you’ll see a Tile settings link that provides a short list of settings for the Start screen. These include whether to show administrative tools on the Start screen and a button for clearing personal information from the tiles.
From within an app, you’ll see different settings depending on the app. For this reason, we examine app settings in the respective chapters throughout this book.
The grid of settings icons you see at the bottom of the Settings pane is perhaps the most interesting bit here.
The Network icon provides access to your PC’s networking connections, discussed in Chapter 13.
You can also change the volume using hardware keys, either on your device (volume buttons are common on modern tablets, for example) or via your keyboard, where some PC makers are reassigning function keys to control the volume.
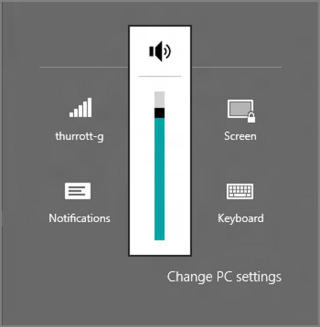
The Volume icon provides a way to change the system volume using a slider that appears when the icon is clicked, as in Figure 3‑13.
Figure 3‑13: Adjusting the volume
The screen brightness icon similarly provides a way to control the brightness of the screen on compatible devices. (Generally, it will be available on portable machines but not on desktop computers.)
Notifications lets you determine whether notifications, described a bit later in the chapter, are globally on or disabled (“hidden”) for some period of time so you can get work completed without interruption.
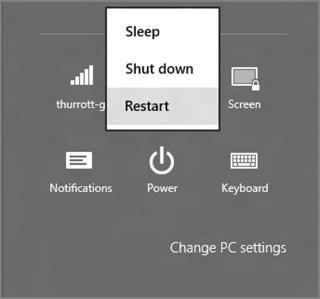
Power toggles between the power states Sleep, Shutdown, and Restart, meaning that it’s a fairly important control (see Figure 3‑14). You may recall that you would perform these operations in Windows 7 from the Start menu. But with the Start button and menu missing in Windows 8, Microsoft opted to put this functionality in a location that would be accessible from anywhere in the system, whether you were using the Start screen, a Metro‑style app, or the desktop. So here it is.
Figure 3‑14: Power options
The keyboard icon lets you switch between the different keyboard language layouts your PC or device supports. For most, this will be just one, such as US English, but Windows 8 is the first version of Microsoft’s flagship OS in which every single product edition–Windows 8, Windows 8 Pro, Windows 8 Enterprise, and Windows RT–supports switching languages on the fly using Language Packs. So now everyone can get their multilingual game on.
Finally, take note of the More PC Settings link at the bottom of the Settings pane. PC Settings is the Metro‑style replacement for the Control Panel–though to be fair, you’ll still be accessing various control panels, too, as you’ll see throughout this book–and as such, it’s pretty darned important. We look at PC Settings in depth in Chapter 5.
Дата добавления: 2015-05-13; просмотров: 1326;